Wednesday, March 19, 2008

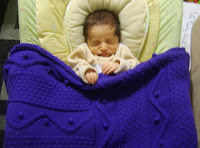
Zoology Baby Blanket

Zoology Baby Blanket

This idea came from my doodles during a Zoology class. I wanted this project to be portable, but I did not want to sew together a dozen or more pieces at then end, so it is made in 4 separate pieces. This makes it a very portable project, but the seaming is not overwhelming. I made it for my nephew, and it was so nice that his mother stole it! (but I made her give it back)

Yarn: Lion Brand Microspun(2.50 oz./70 g (168 yd/154 m)100% micro-fiber acrylic), 6 balls

Color: 147 Purple

Needles: Size 6 straight or circular

Gauge: 24 st/32 rows=4 inches

Size: 36”x 36”square

Other supplies: f/3.75 mm crochet hook, tapestry needle

Square: (make 4)

Cast on 109 stitches

Set up pattern:

First row (wrong side): (work row 1 of squiggle cable chart over first 16 stitches, then row 1 of dots chart over next 15 stitches) 3 times, work row 1 of squiggle cable chart over last 16 stitches. (read wrong side/odd rows of chart from left to right, right side/even rows from right to left)

Continue as established, (squiggle, dots, squiggle, dots, squiggle, dots, squiggle), the dots chart will be repeated 9 times for every 1 time the squiggle pattern is repeated.

Stop when 3 repeats+ 35 rows of the squiggle cable chart have been worked (4 repeats, omit the last row of the 4th repeat)

Bind off all stitches

Assembly:

Sew the left side of one square (square #1) to the bind off edge of another square (square #2)

Sew bind off edge of next square (square #3) to left side of square #2

Sew bind off edge of last square (square #4) to left side of square #3

Sew left side of square #4 to bind off edge of square #1

Work two rounds of single crochet around entire outer blanket edge.

Weave in ends.


Dots Chart


Squiggle Cable Chart


Symbols:

= knit on right side, purl on wrong side

= purl on right side, knit on wrong side

3 st RPC = slip 1 stitch to cable needle and hold in back, knit 2, purl 1 from cable needle

3 st LPC = slip 2 stitches to cable needle and hold in front, purl 1, knit 2 from cable needle

B = make bobble- (knit one, yarn over, knit one, yarn over, knit one) all in one stitch, turn, knit 5, turn, purl 5, turn, slip 2nd, 3rd, 4th, and 5th (from left to right) stitches over first stitch off the needle


Wednesday, February 20, 2008

Tuesday, October 9, 2007

Treehugger

Treehugger

Yarn:

MC: Moda Dea Metro (94% Acrylic, 6% NylonNet wt. 100g . 3.52 oz114m . 124 yds) Color: 9340 Chocolate, 1 skein (to be used single stranded)

CC: Caron Simply Soft (6 oz (170 grams) 330 yards 100% acrylic)

Color: 068070 Dark Sage, 1 skein (to be used double stranded)

Gauge: 13stitches/4 inches (not essential to get exact guage) on size 10.5 needles

Additional materials: Stitch marker

Size J (6 mm) crochet hook (or enough matching fabric to make a 3.5 inch circle if you don’t want to crochet)

Stuffing

Extra yarn in light color to embroider face

Size: approximately 13 inches tall and 9 inches wide (at widest point)

Trunk:

Cast on 32 stitches with MC

Place marker to indicate beginning of round

Join to work in the round and work in stockinette stitch (knit every round) until piece measures 1.5 inches from cast on

Next round: (k2tog, k14) twice (30 stitches remain)

Continue in Stockinette until piece measures 3 inches from cast on

Next round: (k2tog, k13) twice (28 stitches remain)

Continue in stockinette until piece measures 4.5 inches from cast on.

Cut yarn, place first 14 stitches on a spare piece of yarn

Front of top:

(Worked back and forth)

Join 2 strands of CC

First row: k1, kfb, k4 with CC, join MC and k3 with it, k7 with CC

Note: In every row, you will be working the middle stitches in stockinette stitch (knit every right side row, purl every wrong side row) with the MC. use the intarsia method of twisting the two colors at the first color change, but if you want, you can strand the CC across the back for the second color change to avoid using another ball.

The CC stitches on either side of the column of MC will be worked in loop stitch.

(so when I say “work to end” I mean work CC in loop stitch to color change, work 3 MC stitches in stockinette, work CC in loop stitch until specified)

Right Side Increase Row 2: k1, kfb, work to last 2 stitches, kfb, k1

Wrong Side Increase Row: p1, pfb, work to last 2 stitches, pfb, p1

Do an increase row every row 8 times (until there are 31 stitches on the needles)

Continue knitting straight in loop stitch for CC and stockinette for MC column for 9 rows

Right Side Decrease Row: k1, ssk, work to last 3 stitches, k2tog, k1

Wrong Side Decrease Row: p1, p2tog, work to last 3 stitches, ssp, p1

Do a decrease row every right side row twice (27 stitches remain)

Note: At this point, stop working the stockinette column of MC and work only in loop stitch with the CC

Do a decrease row every row 6 times (15 stitches remain)

Bind off all stitches

Back of Top:

put the 14 stitches that were earlier held on a piece of yarn on to a needle to work them back and forth (like the front)

If you want the toy to be reversible, work exactly the same as front of top

If not, work the same as front of top, except without the MC stockinette column (entire thing will be in loop stitch with CC)

Bottom of Trunk:

Using MC and a size J crochet hook, crochet a circle with a diameter of about 3.25 inches

Or cut out a piece of matching fabric into a circle with a diameter of 3.5 inches (with seam allowance)

Finishing:

Using MC, embroider Branches onto the front of the top as in the diagram

Using lightly colored yarn, embroider the face onto the trunk as in the diagram

Sew bottom of trunk onto cast on end of trunk

Fill trunk with stuffing

Using mattress stitch and one strand of CC, sew up one side of top and around to the other side, leaving an opening to stuff

Fill top with stuffing

Sew top together the rest of the way.

Hug your tree.

Loop Stitch:


knit on RS, purl on WS

Ω make loop (k1 but do not slip off of left needle, bring yarn to front, wrap around

thumb to make a loop, bringing yarn to the back, k the same stitch again, slip both stitches off of left needle onto right needle, pass first stitch over second stitch)

Abbreviations:
MC…..main color

CC…...contrast color

RS…..right side

WS…..wrong side

K…..knit

P…..purl

Kfb…..knit into the front and back of the same stitch

Pfb…..purl into the front and back of the same stitch

K2tog…..knit 2 together

Ssk…...slip one stitch knitwise, slip next stitch knitwise, return both to left needle and knit them together through the back loops

P2tog …..purl two stitches together

Ssp….. slip one stitch knitwise, slip next stitch knitwise, return both to left needle and purl them together through the back loops


Monday, October 1, 2007

Squiggly

Squiggly Baby Hat


Yarn: Bernat Bamboo (86% bamboo, 12% acrylic, 2% polyester, 2.1 ounces (60 grams) 63 yard), 1 ball in “water”

Gauge: 14 stitches/20 rows = 4x4 inches in stockinette stitch on size 10 needles (whatever kind you prefer for small diameter circular knitting)

Sizes: 14” circumference, (16”) (approximately 5” (6”) height)

Cast on 48 (56) stitches, join to knit in the round

Knit one round

Work Squiggly Chart around (repeat 6 (7) times in each round) for 4 (5) repeats (20(25) rounds)

Knit one round

Begin top shaping:

Round 1: (k6, k2tog), repeat around, 42(49) stitches remain

Round 2: knit

Round 3: (k5, k2tog), repeat around, 36 (42) stitches remain

Round 4: knit

Round 5: (k4, k2tog), repeat around, 30(35) stitches remain

Round 6: knit

Round 7: (k3, k2tog), repeat around, 24(28) stitches remain

Round 8: (k2, k2tog), repeat around, 18(21) stitches remain

Round 9: (k1, k2tog), repeat around, 12(14) stitches remain

Round 10: k2tog around, 6 (7) stitches remain

cut yarn and thread end through remaining stitches using tapestry needle

weave in ends

if desired, make a 1 ½ inch pom-pom and attach to top

Squiggly Chart:

knit

purl

Abbreviations:

k……knit

k2tog……knit two stitches together

Tuesday, September 4, 2007

Sockabooties

Sockabooties
My first non-purple pattern! I made these to match the top down bonnet from helloyarn

Yarn: Debbie Bliss Baby Cashmerino, 55% Merino wool, 33% Microfibre, 12%
Cashmere, 137 yards / 125m per 50g, color 503, 1 skein

Size: 4 inch circumference, 3 inches long

Gauge: 26st/34 rows in 4 inches on size 3 (3.25 mm) dpn’s

Toe:

Cast on 13 stitches using crochet provisional cast on. Work back and forth with 2 dpns

Purl one row

Short rows:

  1. K12, w&t
  2. p11, w&t
  3. k10, w&t
  4. p9, w&t
  5. k8, w&t
  6. p7, w&t
  7. k until you encounter wrapped stitch, pick up wrap and k2tog with stitch it was wrapped around, w&t (stitch will now be double wrapped)
  8. p until you encounter wrapped stitch, pick up wrap and p2togtbl with stitch it was wrapped around, w&t (stitch will now be double wrapped)
  9. k until you encounter double wrapped stitch, pick up wrap andk3tog with stitch they were wrapped around, w&t (stitch will now be double wrapped)
  10. p until you encounter double wrapped stitch, pick up both wraps and p3togtbl with stitch they were wrapped around, w&t (stitch will now be double wrapped)
  11. k until you encounter double wrapped stitch, pick up both wraps and k3tog with stitch they were wrapped around
  12. p until you encounter double wrapped stitch, pick up both wraps and p3togtbl with stitch they were wrapped around
  13. k one row

Foot:

Unzip provisional cast on and move stitches onto 4 dpns, 7 on the first needle, 6 on the second, 7 on the third, and 6 on the fourth.

Pm to indicate beginning of round

Knit every round until bootie measures 2 ¼ inches from the beginning of the toe

Heel:

K all stitches on the first and second needle

Combine the stitches from the third and fourth needle onto one needle. These are the heel stitches.

Working heel stitches back and forth:

  1. K12, w&t
  2. p11, w&t
  3. k10, w&t
  4. p9, w&t
  5. k8, w&t
  6. p7, w&t
  7. k until you encounter wrapped stitch, pick up wrap and k2tog with stitch it was wrapped around, w&t (stitch will now be double wrapped)
  8. p until you encounter wrapped stitch, pick up wrap and p2togtbl with stitch it was wrapped around, w&t (stitch will now be double wrapped)
  9. k until you encounter double wrapped stitch, pick up wrap andk3tog with stitch they were wrapped around, w&t (stitch will now be double wrapped)
  10. p until you encounter double wrapped stitch, pick up both wraps and p3togtbl with stitch they were wrapped around, w&t (stitch will now be double wrapped)
  11. k until you encounter double wrapped stitch, pick up both wraps and k3tog with stitch they were wrapped around
  12. p until you encounter double wrapped stitch, pick up both wraps and p3togtbl with stitch they were wrapped around
  13. knit across

return heel stitches to 2 dpns and go back to working in the round

Top:

Pick up one stitch in the gutter between the fourth needle and the first needle (put picked up stitch on fourth needle), k across first and second needles, pick up one stitch in the gutter between the second and third needles (put picked up stitch on third needle), k to one stitch before end of round, k2tog

Next round: k across first and second needles, ssk, k to end of round

K 2 rounds even

(p 1 round, k 1 round) twice, p 1 round

Bind off all stitches loosely knit wise

Weave in ends

Ties:

Cut two 12 inch pieces of yarn, thread each through one bootie right under the first purl round so that the ends come out in front about a half inch apart.

knot each end of the tie to prevent fraying and trim to desired length, tie in bow

Abbreviations:

k…..knit

p…..purl

w&t….wrap and turn (move next stitch to right needle, move yarn to the front on a knit row or to the back on a purl row, return stitch to left needle, turn work)

dpn…..double pointed needle

k2tog…..knit 2 together

k3tog…..knit 3 together

ssk.....slip slip knit (slip one stitch knitwise and then another stitch knitwise, return both stitches to left needle, knit them together through back loops)

p2togtbl…..purl 2 together through back loops

p3togtbl…..purl 3 together through back loops

pm…place marker

Monday, September 3, 2007

Twisted Scarf

Twisted Scarf

Yarn: Debbie Bliss Cashmerino Aran

Color 607 (dark purple), 2 skeins (MC)

Color 601 (light purple), 1 skein (CC)

Needles: Size 8 (5 mm) straight or circular

Gauge: 18st/24 rows in 4 inches

Size: approximately 5 inches wide and 45 inches long

To make wider, add more stitches to the seed stitch sections

Making it wider or longer will require extra yarn

CO 9 st with MC, then 12 st with CC, then 9 st with MC (use separate ball)

Begin working chart on row 1 (ws)

Twist yarns at each color change, and on rows 5-9 twist the yarn at the first color change and then strand behind the work for the next two, then twist on the fourth color change and strand on the last two, so that only 3 balls need to be used throughout

Continue until one of the colors runs out or desired length, (end after row 1 of chart)

BO 9 st with MC, 12 st with CC, 9 st with MC

Weave in ends and add fringe if desired

Abbreviations

CO….cast on

MC….main color

CC…..contrast color

St……stitches

K…….knit

p……..purl

BO…..bind off

Ws…..wrong side

Rs……right side

Cn……cable needle

Chart


k on rs, pl on ws

p on rs, k on ws

S slip stitch

CC 6st RC slip 3 MC st to cn, hold to back, k3 CC stitches, k3 MC st from cn (keep color of yarn not in use stranded in back for all cables)

CC 6st LC slip 3 CC st to cn, hold to front, k3 MC st, k3 CC st fom cn

MC 6st RC slip 3 CC st to cn, hold to back, k3 MC st, k3 CC st from cn

MC 6st LC slip 3 MC st to cn, hold to front, k3 CC st, k3 MC st from cn